


I'm so excited for this week's Techy Teacher Tuesday post (thanks for hosting Katie King)!
I just learned how to do this (nicely) recently and wanted to share...jazz up your blog posts by including some cute pictures (along with clip art paper backgrounds, arrows, fonts, and your blog button, of course!).
So before I begin, I wanted to stress that I am NO WAY an expert at this, and I'm sure there is a simpler, faster way of doing this but this is how I do it, nice and easy to learn, so that's why I am sharing. I am not the best at computers, but slowly I am learning more and more each day so hopefully I can help someone with this post (the rest of you computer experts out there, you can stop reading my post now! HA!)

Here's my example.
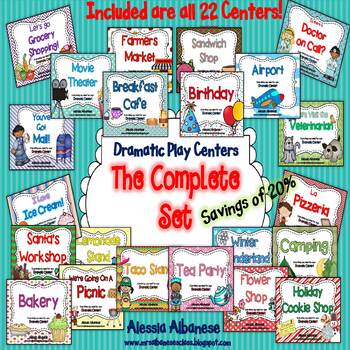
I wanted to create a cute image that will grab my audience's attention to my newest Write the Room unit I just added to my Bundled Set.
I started with a paper clipart background and just added images and text from there.
I like to do all my things in Power Point so I'm going to show you how to do it this way - trust me....it's MUCH better than Word!

Start by inserting a paper clipart background (from your clipart file).

If the paper background doesn't fit nicely on your page you can enlarge it easily.

You can insert images on top of this paper, add text boxes and even your blog button.
I added arrows and circle shapes too. Just click on Insert, Shapes and you will find those things there. You can easily adjust the color and size by clicking on Format.
To add your blog button, make sure you right click your button image on your blog and save it.
Then insert the button as another image.

To save this whole thing as an image (your final one to post, yah!) here's a little trick.
Click Save As, Other Formats and click on JPG from the scroll list. Name the image and it will be saved as JPG. Now you can insert this *final* image into your blog posts!
Last step: Want to add a link to that image that you just posted on your blog like mine?
This makes it easy for people to click on that image and take them to that product/site.
Click on the image you just inserted. The Link button found on the toolbar at the top of your post will be highlighted. To unhighlight it just click it. Now click it again so that a box appears where you can inset the URL (website) that the image will take you to.
Sorry for the step-by-step details but I have said it before... I am a visual learner and write everything down. Hope this helps those of you out there who are like me - if there are any! I'm sure most of you already know how to do all of this so sorry for the ramblings!
Good luck with your future blog posts...can't wait to see what you create! Leave me a comment and link if you do!


I am so going to try this! Thanks for the awesome tip. My new name for you is...Powerpoint Queen!
ReplyDeleteѼ Lori
Teaching With Love and Laughter
luvyorkies@gmail.com
Hi Alessia- Great tutorial! Do you ever find the background stretches & doesn't look right? Instead of inserting it as a picture, try clicking Design, then Background Styles, then Format Background, then Picture or Texture Fill, then File & choose your background. Check the box Tile Picture as Texture & then Close. Your background will appear & will not be distorted. {Sounds confusing, but it's not, I promise!} Thanks for your Tech Posts!
ReplyDeleteAnita
Mrs. Bremer’s Kindergarten
I just figured this out last week! I heard everyone talking about how much easier it was to do all these things in PowerPoint. I didn't believe it could make that much difference. Boy was I wrong!
ReplyDeleteThanks for posting this! As a new blogger I have been trying to teach myself how to do all of these things. This post let me know that I am on the right track!
ReplyDeletesunflowerinspirations.blogspot.com